
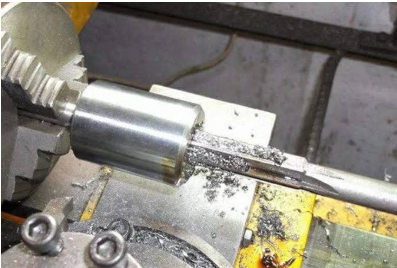
A reaming process being performed on a metal piece
Have you ever wondered why your reaming process doesn’t always deliver the flawless, precise holes you expect? Whether it’s oversized holes, poor surface finishes, or tool breakage, reaming issues can disrupt your workflow and affect product quality. But here’s the good news: these problems aren’t inevitable. With the right knowledge and adjustments, you can troubleshoot and solve them effectively.
Reaming plays a vital role in machining, ensuring accuracy and smoothness in drilled holes. However, challenges like tool wear, speed inconsistencies, and material variability can make the process tricky. In this article, we’ll explain 7 common problems encountered in reaming, explain their causes, and offer practical solutions to fix them. Whether you’re a beginner or a pro, these tips will help you optimize your reaming results.
What Is Reaming?
Reaming is a machining process used to enlarge, finish, or refine pre-drilled holes to achieve precise dimensions and smooth surface finishes. This process involves the use of a specialized cutting tool called a reamer, which removes a small amount of material from the inner surface of the hole. Reaming is commonly employed in applications where high accuracy and tight tolerances are required.
Unlike drilling, which creates a rough hole, the different types of reaming focuses on enhancing the hole’s quality by making it rounder, smoother, and dimensionally accurate. It is widely used in industries like automotive, aerospace, and manufacturing, where precision is critical. Reaming can be performed manually or with CNC machines, depending on the complexity and scale of the project.
7 Common Problems in Reaming
Reaming is an essential machining process, but like any precision operation, it is not without its challenges. Below are the seven most common problems encountered during reaming, explained in detail:
1. Oversized Holes
One of the most frustrating issues in reaming is creating holes larger than the intended size. Oversized holes often result from a worn or improperly sized reamer. Excessive tool pressure, thermal expansion during operation, or incorrect feed rates can also lead to this problem. When the reamer removes too much material, the final hole diameter exceeds the specifications, causing misfit parts or assembly issues. Ensuring the reamer matches the hole tolerance is critical to avoiding this issue.
2. Poor Surface Finish
Achieving a smooth, polished finish is one of the primary goals of reaming, but poor surface quality is a common problem. This can be caused by machine vibrations, improper cutting speeds, or dull reamers. Insufficient lubrication or contamination on the cutting tool can also lead to uneven or scratched surfaces. Poor surface finishes not only compromise the aesthetics of the hole but can also affect the performance and fit of the part, especially in precision applications.
3. Tapered Holes
Tapered holes occur when the hole diameter changes along its depth, with one end being wider than the other. This issue arises due to misalignment between the reamer and the workpiece or inconsistencies in the machine feed rate. Uneven pressure applied during the process can also lead to tapered results. Tapered holes are problematic in applications requiring tight fits, as the variation in diameter compromises the uniformity and functionality of the finished product.
4. Tool Chatter
Tool chatter, or vibration during the reaming process, can significantly affect the quality of the hole. Chatter leaves irregular patterns and waviness on the hole’s surface, reducing its accuracy and finish. This issue typically occurs when the reamer is poorly supported, the tool speed is too high, or the material being reamed is too hard. External vibrations from the machine or workspace can also contribute to chatter, making it a persistent challenge in high-precision machining.
5. Tool Breakage
Breaking a reamer mid-operation is a costly and time-consuming issue. Tool breakage often results from excessive cutting forces, improper material selection, or incorrect feed rates. Reamers can also snap if they encounter a hardened or uneven surface in the hole. Inconsistent lubrication and poor heat dissipation exacerbate the problem, leading to mechanical failure. This issue not only halts the machining process but can also damage the workpiece, requiring rework or replacement.
6. Misalignment of Holes
Misalignment occurs when the reamer doesn’t enter the pre-drilled hole correctly, resulting in an off-center or skewed hole. This problem is common when the reamer or workpiece isn’t properly secured. Misalignment can also occur due to worn tool holders, loose fixtures, or operator errors during setup. The result is a hole that fails to meet dimensional or positional requirements, making it unsuitable for assembly or further machining processes.
7. Premature Tool Wear
Reamers are precision tools, and excessive wear reduces their ability to produce accurate holes. Premature tool wear occurs due to high cutting speeds, aggressive feed rates, or inadequate lubrication. Reaming abrasive or hardened materials without the proper reamer coating can also accelerate wear. Worn reamers create oversized holes, poor finishes, and even damage to the workpiece. Regular tool inspection and maintenance are necessary to prevent this issue from escalating.
How to Address Each Problem
While reaming issues can disrupt your machining process, most of them have clear and actionable solutions. Here’s a detailed breakdown of how to address each problem effectively:
1. Oversized Holes
Oversized holes occur when the reamer removes too much material, and this can be resolved by ensuring the reamer is the correct size and in good condition. Always inspect the reamer for signs of wear before starting. Additionally, calibrate the machine settings to match the material and desired hole tolerance. Using a coolant during the reaming process can also reduce thermal expansion, ensuring the reamer maintains its shape and delivers precise results.
2. Poor Surface Finish
To improve surface finish, ensure the reamer is sharp and free from wear. Dull or damaged tools create rough finishes, so regular maintenance and timely replacement are essential. Reduce vibrations by securing both the reamer and the workpiece firmly. Proper lubrication is also critical—apply the recommended coolant to minimize friction and heat buildup. Lastly, optimize the cutting speed and feed rate, as excessively high or low settings can negatively impact the finish quality.
3. Tapered Holes
Tapered holes can be addressed by aligning the reamer perfectly with the pre-drilled hole. Use precision alignment tools or guides to ensure the tool enters straight and remains centered. Uniform pressure during the reaming process is also essential—avoid applying uneven force. Check the machine’s feed rate for consistency, as variations can lead to tapering. Regularly inspect tool holders and fixtures to ensure they are secure and free from wear that could cause misalignment.
4. Tool Chatter
Eliminating chatter requires addressing the root causes of vibration. Start by lowering the cutting speed, as excessive speed often exacerbates vibrations. Secure the reamer and workpiece tightly to minimize movement during operation. If the issue persists, consider using a reamer with a different geometry or coating, as some designs are better suited to reduce chatter. External dampening systems or stabilizers can also be added to the setup to absorb vibrations and improve stability.
5. Tool Breakage
Prevent tool breakage by ensuring proper tool setup and using the correct reamer for the material. Avoid applying excessive force or using aggressive feed rates. If the material is particularly hard or abrasive, select a reamer with a durable coating, such as carbide or diamond-coated reamers. Proper lubrication is critical to reducing heat buildup and friction, which can weaken the tool. Regularly inspect the workpiece for inconsistencies, such as hardened surfaces, that might cause tool damage.
6. Misalignment of Holes
To address misalignment, ensure the reamer is properly positioned and aligned with the pre-drilled hole. Use high-quality tool holders and fixtures to secure the tool and workpiece firmly. Precision guides or CNC machines can help maintain alignment during the process. Double-check the setup before starting the operation to eliminate operator errors. Additionally, monitor the reamer and machine for wear or looseness, as these factors can compromise alignment over time.
7. Premature Tool Wear
Minimize premature wear by selecting the right reamer material and coating for the job. For abrasive or hard materials, use reamers with carbide or titanium coatings to extend tool life. Adjust the cutting speed and feed rate to reduce unnecessary strain on the tool. Regularly apply proper lubrication to lower friction and heat. Finally, implement a maintenance schedule to inspect and replace worn reamers before they start affecting the quality of your work.
Conclusion
Reaming is a vital machining process, but like any precision operation, it comes with challenges. From oversized holes to tool wear, understanding these problems and applying the right solutions can significantly improve your results. Proper tool maintenance, precise alignment, and optimized machine settings play a key role in addressing these issues. Additionally, selecting the right type of reamer for your material and application ensures durability and accuracy. By staying proactive, you can enhance productivity and achieve high-quality, reliable outcomes in your machining projects.


